Laxraven and I just released our collaborative project “Mining Structures” on FxHash. It was a huge success, and I have received many questions about the process and techniques used. Here is a quick walkthrough.
The project started with a failure. @Laxraven had posted a beautiful architectural drawing on Twitter, and someone mentioned they would love to see a generative version – to which I foolishly replied, “Challenge accepted”.
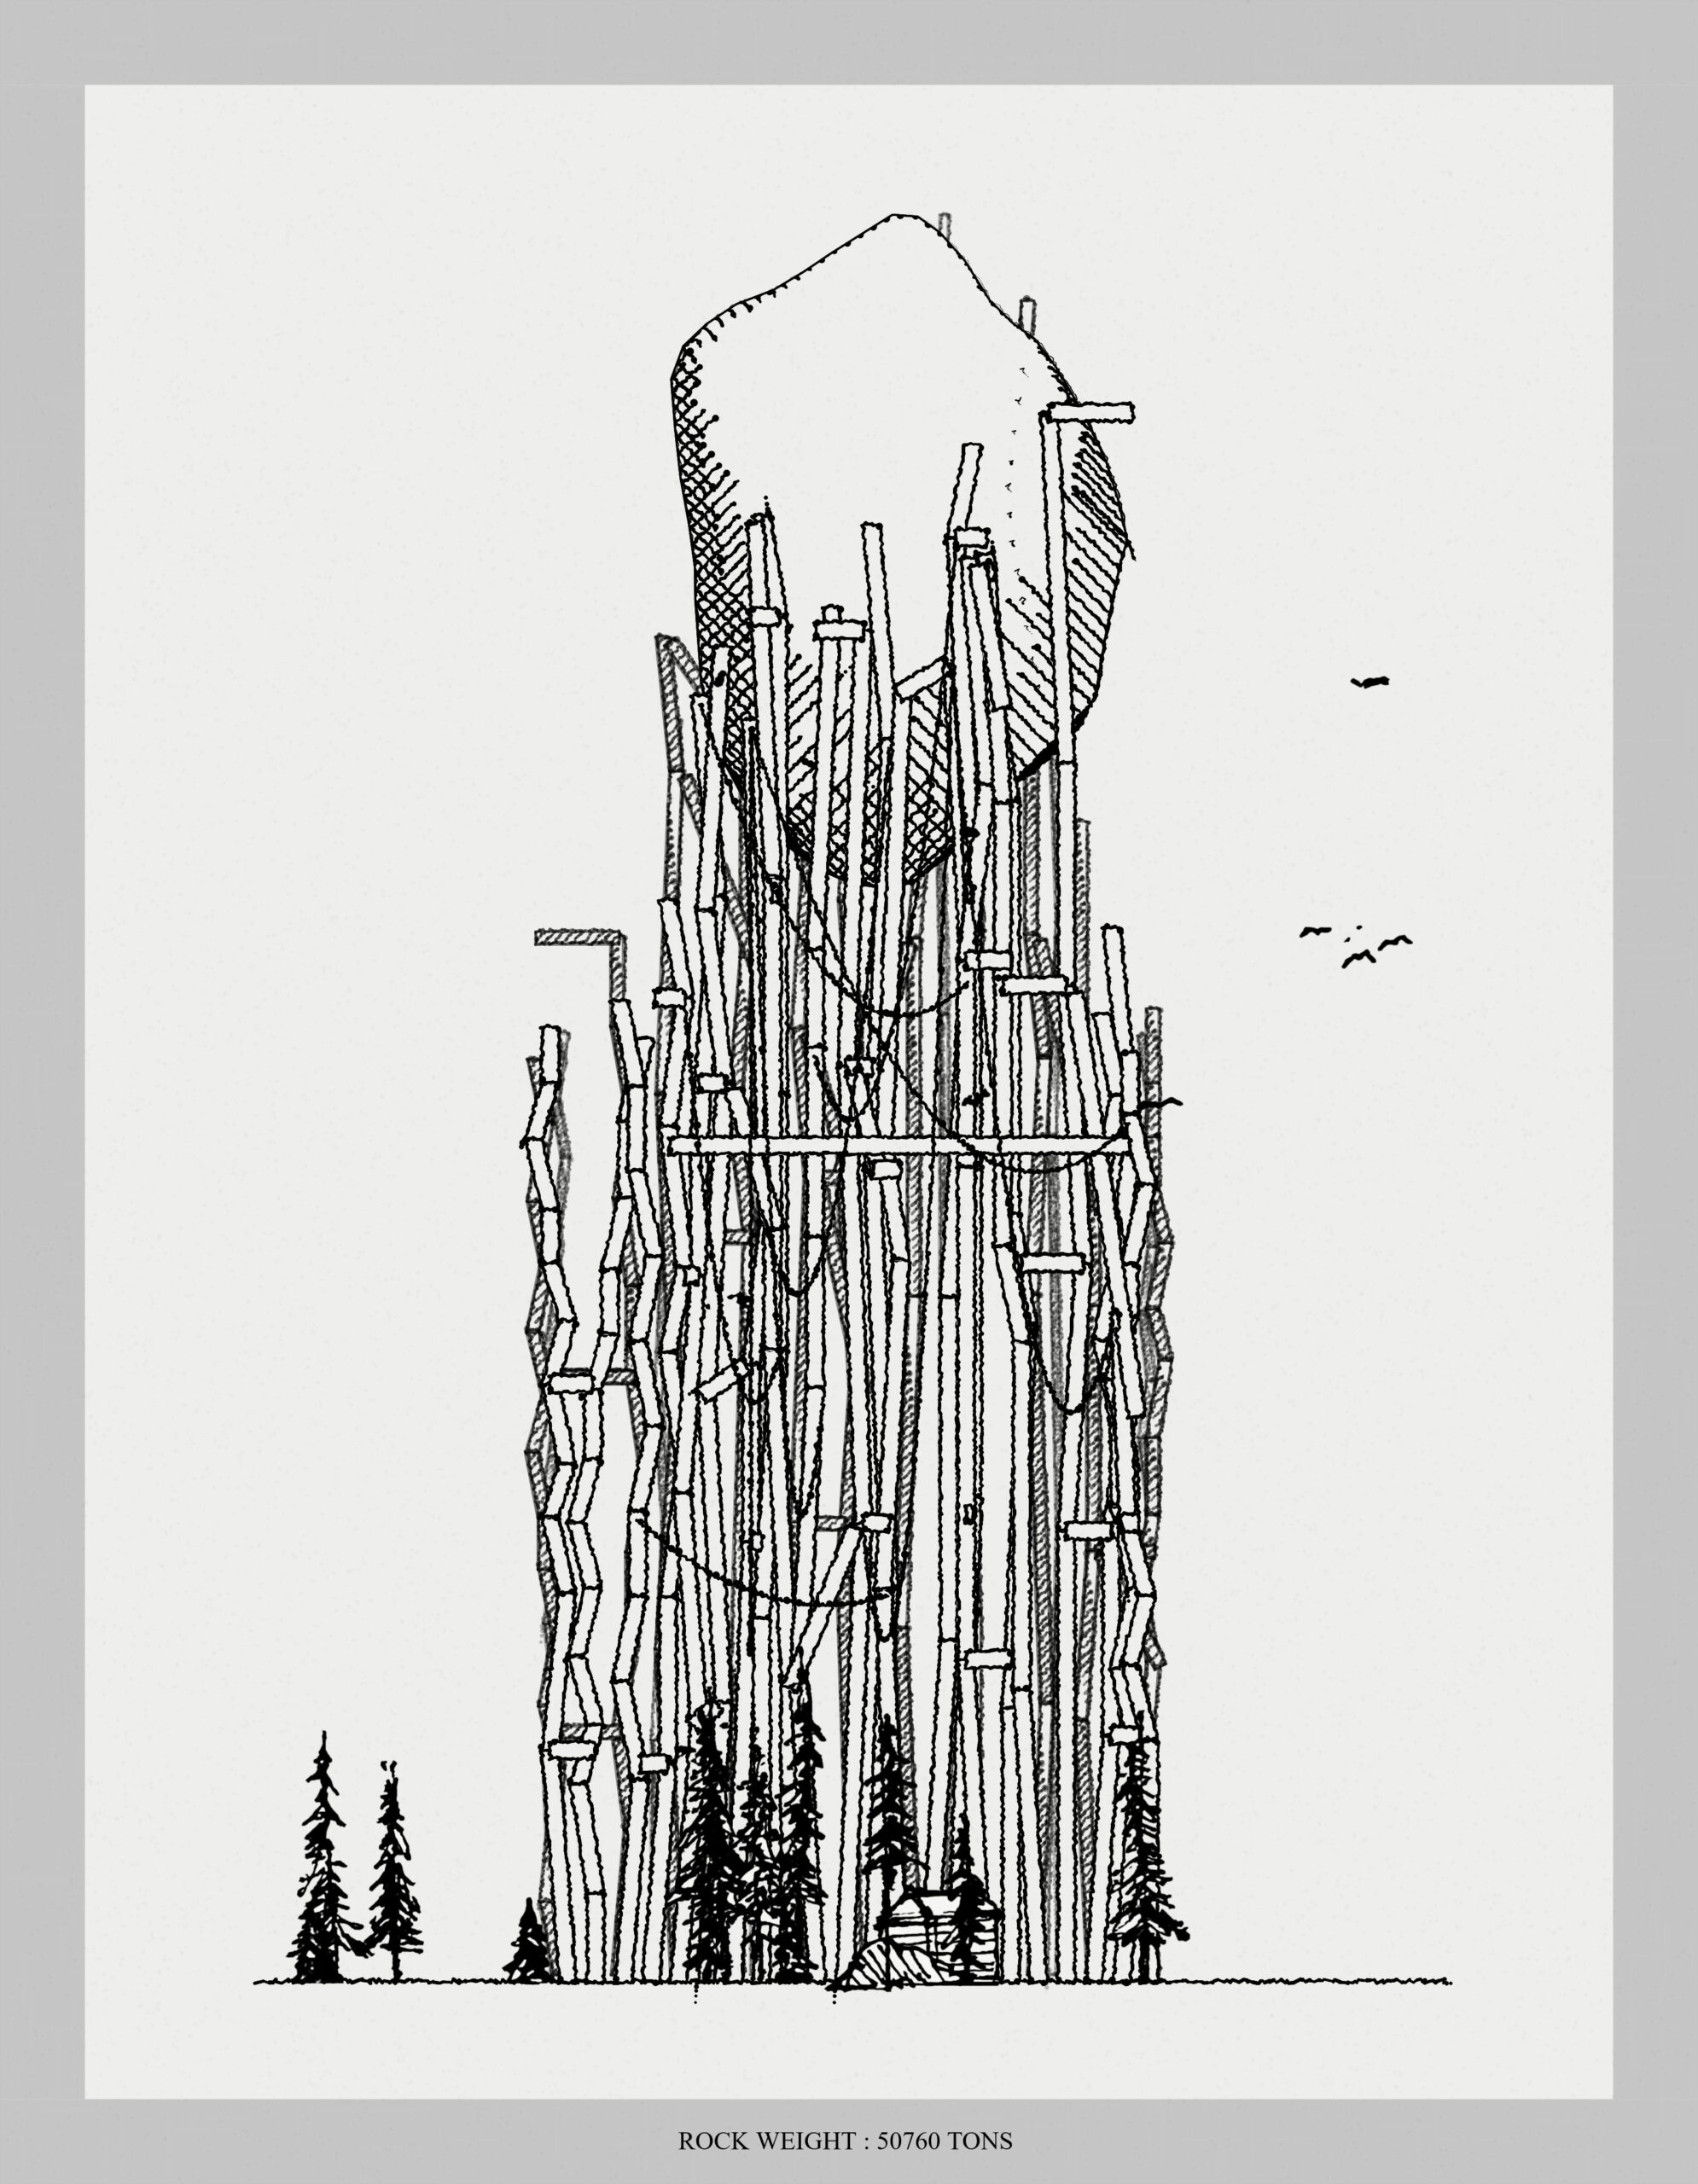
As it turned out, this initial drawing was pretty difficult to convert to generative. Peter had used very aggressive, loose lines in his sketch, and my initial attempts at emulating these were, well, not that great. So after some discussions we decided to recreate a different piece that would be more suitable. I chose his “Structure holding object” drawing:
Analog lines
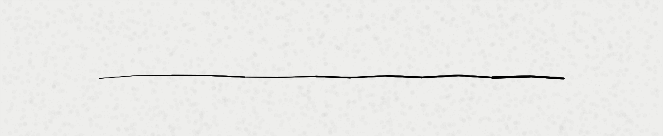
Looking at the details of the original drawing, it was quickly obvious that I needed a way to draw lines with a natural feel to them. Peter’s line are never perfectly straight, some of them have little splatters of ink at the end of the line, or little ink bubbles… So the first step was to write a “natural line engine” in P5.js. I would share the code, but I’m a big adept of “teach a man/woman to fish” principle, so I would rather deconstruct the logic and see what others come up with. If you really want the code, it is on the blockchain.
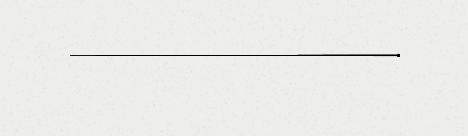
Here are the features I ended up with. In the examples below I am drawing a straight horizontal line.
“analogueness” – this splits the line in a lot of different points (the longer the line, the more points) and displaces each of them randomly. A javascript function is used to control the line weight across the progress of the line.
// color function = black the whole way
var cfunc = (idx, p) => color(0);
// weight function = randomized, but increasing
var wfunc = (idx, p) => ((1+8*idx+3*rnd())/W);
var lineDrawer = new LineDrawer(cfunc, wfunc);
// how often to split, and how much to displace
lineDrawer.setAnalogueness(0.1, 0.01);
// draw horizontal line
lineDrawer.draw(vec2(-0.7, 1.05), vec2(0.7, 1.05));
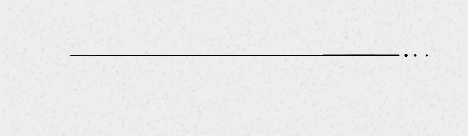
“end bubble probability” – this controls the probability that the line ends with a little ink ‘bubble.
// draw line straight
lineDrawer.setAnalogueness(0.1, 0.0);
// with a bubble at the end
lineDrawer.setEndBubbleProbability(1.0);
“splatter probability” – this controls the probability that the line has little ink splatters at the end. They typically increase in distance and shrink in size. I have parameters to control the minimum line length before splatter occurs, the maximum splatter distance, the splatter probability and the maximum number of repetitions.
// draw line straight
lineDrawer.setAnalogueness(0.1, 0.0);
// with splatter at the end
lineDrawer.setSplatter(10/W, 40/W, 1.0, 5, 1.25);
When combining all the feature together, we get some lovely organic flow with very little code:
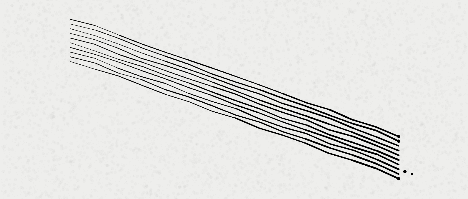
lineDrawer.setAnalogueness(0.1, 0.01);
lineDrawer.setEndBubbleProbability(0.3);
lineDrawer.setSplatter(10/W, 40/W, 0.1, 5, 1.125);
for (var i=0; i<10; ++i)
{
lineDrawer.draw(drawingLayer, vec2(-0.7, 0.5-0.02*i), vec2(0.7, -0.02*i));
}
Shading
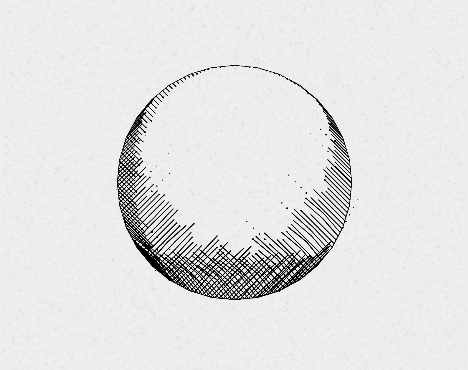
“How did you do the shading on the rock ?” is probably the most frequently asked question. Again I’ll deconstruct it, using a circle as an example.
1. draw lines along the circle in the SE direction
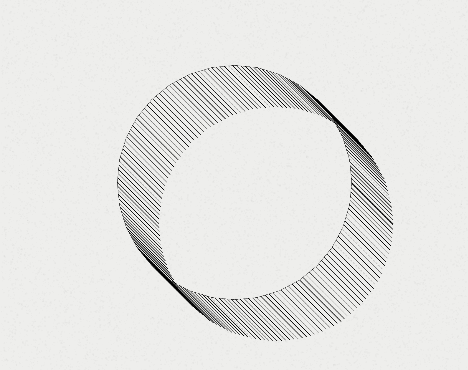
2. adjust the line lengths based on their position on the circle
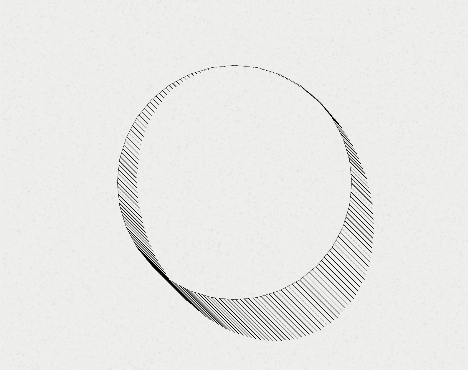
3. Randomize line lengths a bit
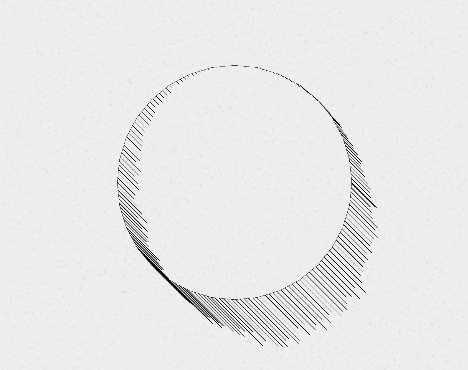
4. Do it again in the NE direction.
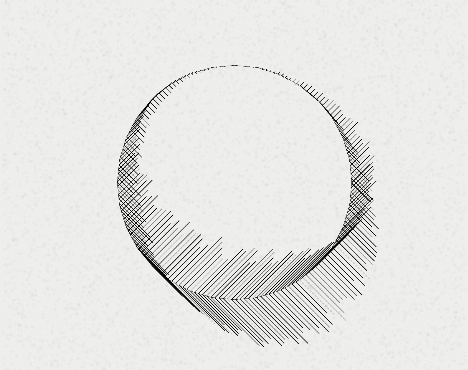
5. And again in the NW direction
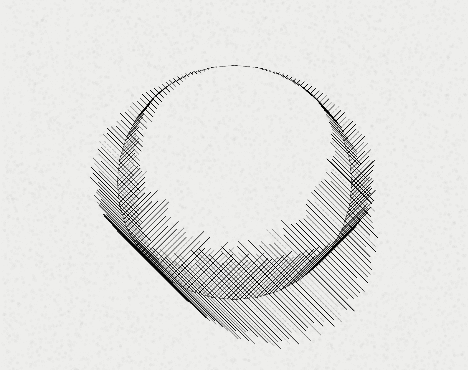
5. Clip drawing to the original circle
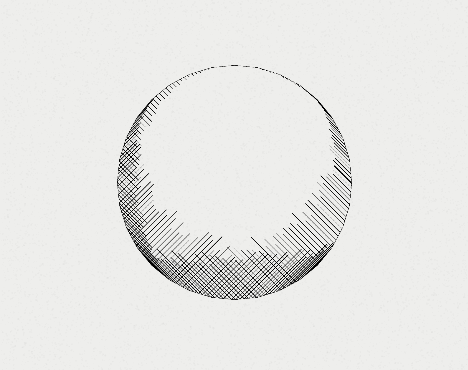
6. Turn on “analog line drawing” features
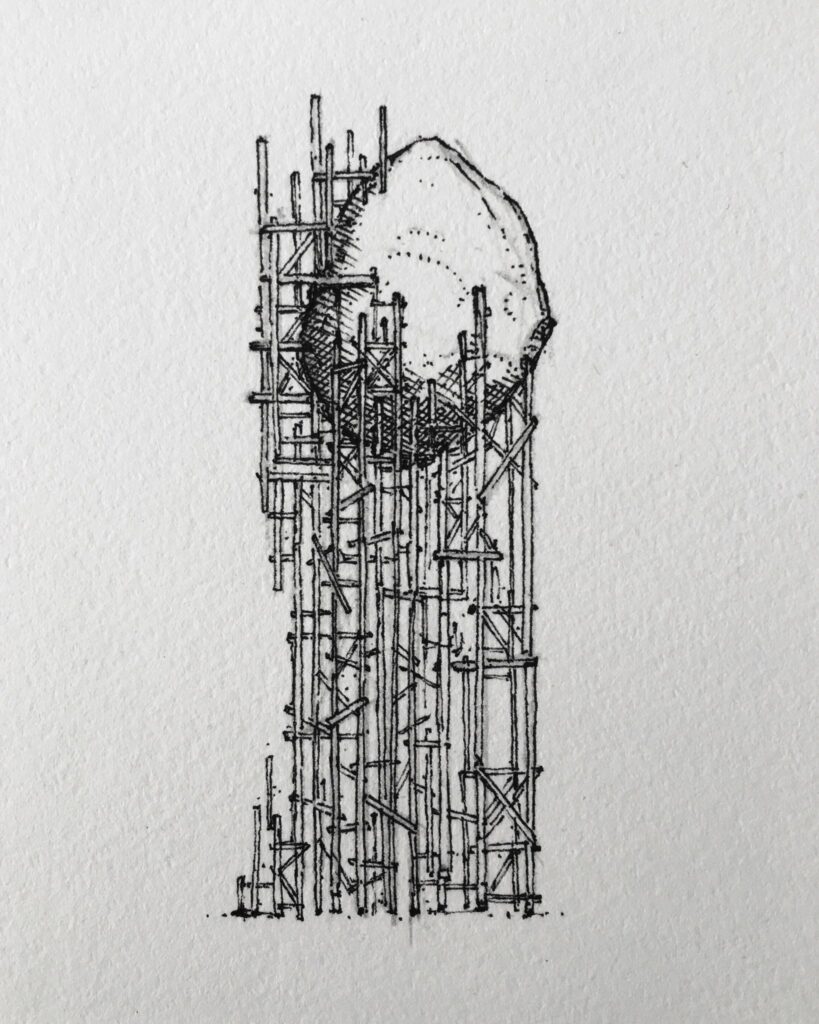
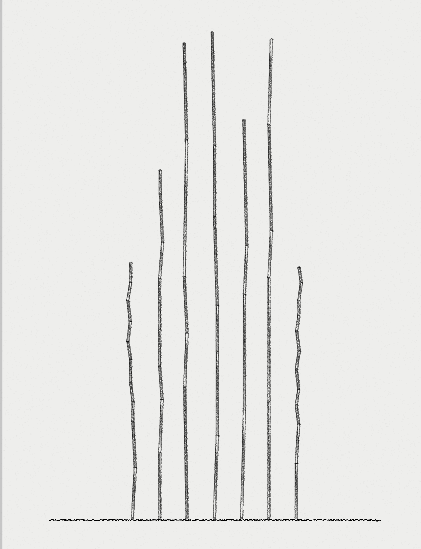
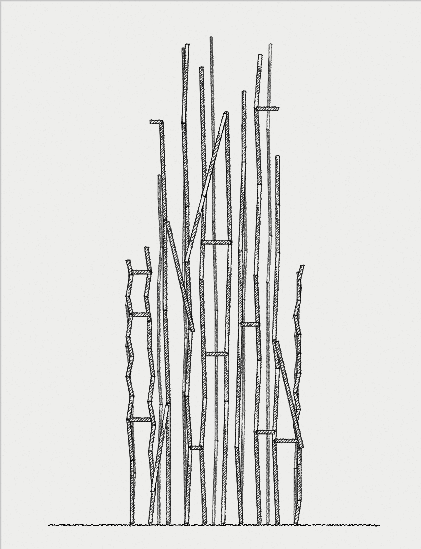
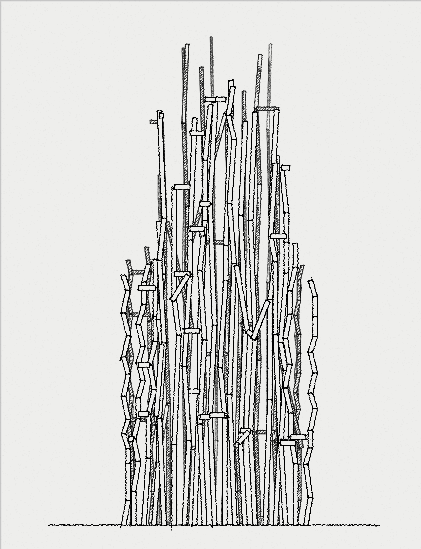
Drawing the scaffolding
With the line drawing engine in place, this part was rather straightforward. I drew it in 3 layers with various levels of transparency to give it a sense of depth. Each layer is made of vertical rectangles of random heights that are randomly split and displaced.
Drawing the ropes
These were not in the original drawing, but we decided they would add a nice textural change to the piece.
They are made by picking random pairs of points within the scaffolding (or the main rock) and drawing a parabola between them. The parabola is adjusted so the middle point has the same height than the lowest point in the pair. This made the math somewhat easy to deal with.
Adding analog elements
The generative drawing was starting to look pretty good at this point, but it took another dimension entirely once we added analog elements on the ground line. Laxraven drew several trees, houses, and rocks using ink on paper, scanned them, and we mixed them with the generated drawing, taking special care to match the line weights so they would blend seamlessly. This really perfected the illusion, making it very difficult for the viewer to distinguish the analog elements from the generated ones.
During this last phase we also spent a lot of time adding rarity features, such as a random crack in the rock, sometimes filled with gold or opal colors, as well as the ultra-rare “frog” rock.
This project was a lot of fun and I’m looking forward to the next collab with Laxraven !
Here are a few images from the series (including some outtakes from the development that didn’t make it into the final collection).
You can also view the full collection in its high resolution glory (and generate an infinity of variations) at fxhash.
